The Science Of A Soil Test
MU Soil Labs Help Find Out What Is Happening In Your Soil To Help Produce Profitable Crops
PORTAGEVILLE, MO.
With harvests winding down, the farm’s focus might turn away from the
fields. According to specialists at the University of Missouri, now is
just as good as ever to find out what your ground needs.
One way to start planning for next year’s growing season is to get a
soil test and MU’s Soil Fertility Labs are there to help.
A soil test is like taking an inventory of nutrients available to
plants – which area is too high, too low or just right. While plant
growth and prior yields may offer clues to nutrient availability, a
producer won’t precisely know until they test their soil.
“We can tell you what is going on below your feet,” said David Dunn,
MU Extension soil testing lab associate. “We are all about giving
recommendations for farmers to achieve the yields they want.”
Dunn helps manage the Soil Fertility Lab at the Fisher Delta Research
Center, one of the many Agricultural Research Centers operated by the
MU College of Agriculture, Food and Natural Resources (CAFNR). A second
lab is located on the MU Campus in Columbia.
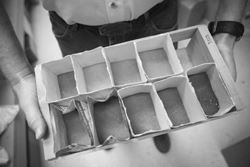
David Dunn holds soil samples ready to be analyzed at the MU Soil
Fertility Lab at the Fisher Delta Research Center.
Each year the lab in Portageville analyzes around 10,000 soil
samples. With each test, producers get a detailed report on pH levels;
available phosphorus, potassium, calcium and magnesium; organic matter;
acidity and cation exchange. These basic tests provide the necessary
data to develop nitrogen, phosphate, potash and agriculture lime
recommendations for intended crops.
In Missouri, the soil organic matter tests are used to estimate
nitrogen availability in the soil. A general rule is every 1 percent of
soil organic matter will release about 20 pounds of nitrogen per acre
for crop availability. Less than half of the samples tested by MU in
2013 had medium levels of soil organic matter of around 2 to 3 percent.
With the results a rating system is applied to give the farmer a
guide to future nutrient needs. Also included are recommendations from
MU specialists on management strategies for specific crops, yield goal
levels to gauge future production and pounds per acre fertilizer
suggestions.
“To ensure the best results and recommendations we suggest taking at
least about 10 to 15 different sub-samples,” said Dunn. “Look at
gathering a sub-sample from at least every acre. Even on small farms the
soil change at different spots in the field.”
To get to these results, several steps at taken by lab technicians.
Once received the samples are sorted and placed in marked containers,
but need to be dried. A special chamber uses heated forced air to dry
the samples. During a 16-hour drying session, the room can separate 200
pounds of water from 400 pounds of soil.
Next, the soil is ground and sieved to remove unwanted pieces such as
rocks, sticks or other organic matter that could flaw results. Each
soil sample is then sub-sampled for the individual tests required.
For most of the tests, extracting solutions are added to the soil
samples. These solutions are water-based chemicals that simulate a
plant’s ability to obtain the nutrient in question from the soil. They
are then analyzed with specialized equipment. To find availability of
potassium, calcium and magnesium the samples are tested in an atomic
absorption spectrometer that burns the soil and solution in an
acetylene-fired flame that changes color based on nutrient levels.
To find phosphorus results, a solution that turns blue in the
presence of phosphorus is added. The intensity of this blue color is
used to determine levels of phosphorus. The deeper the blue color, the
more phosphorus is available to the plants.
To find pH levels, the soil is again mixed with a diluting solution
and analyzed with an electrode that pH levels and gives a read out on
how much nutrients need to be added to reach a healthy pH level for the
sample.
In 2013, the two labs tested more than 17,000 soil samples with more
than a quarter that were very low in soil pH, indicating lime should be
applied for an economically viable crop. A desired pH level would be
around 6.1 to 6.5.
To find phosphorus results, the soil is mixed with an extracting
solution. The water water-based chemical is used to simulate a plant’s
ability to stabilize phosphate. A blue solution is later added to
determine the level of phosphorus. The deeper the blue color, the more
phosphorus is available.
“It’s very important for people to be looking at what is going on in
their soil so they know how to manage it properly,” said Dunn. “It’s
really easy to get us the sample and we can turn around results pretty
fast. Every county MU Extension office can help get the samples to us.”
Before beginning the process of soil test, Dunn also urges producers
to think about how intensive of management you would like to pursue.
“You might have to manage and apply fertilizers on a plot of five acres
differently from the rest of the farm,” he added.
Follow these simple steps for soil test:
• Identify manageable sized fields with similar characteristics (i.e. hillside versus bottomland).
• Using a soil probe or shovel, collect soil 6 inches deep in at least a 1-inch area.
• Collect from at least 10 to 15 locations, on at least every acre.
• Collect sporadically from locations in field.
• Avoid locations near gravel roads, feeding areas or trees.
• Seal soil in plastic bags or containers.
• Label location of sample.
For more detailed instructions, visit http://soilplantlab.missouri.edu/soil/.
For more information and additional services offered through the Fisher
Delta Research Center, visit their new website at http://delta.cafnr.org. ∆